Once you’ve populated and updated the information in your Blackboard course, you’re ready to make the content available to students. On the top right of your course content, you’ll see some icons including an eye (student preview) and a lock. A red closed lock indicates that the course is Unavailable. Select the lock button to make the course available.
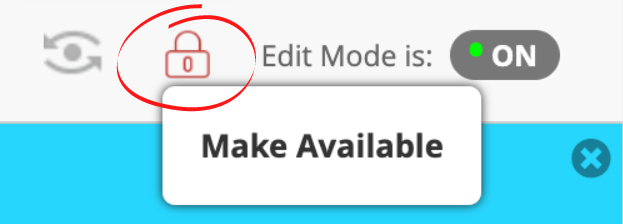
You will know the course is available to students when the lock appears to be open. Hover your mouse over the lock icon anytime to check the status. If it says Make Available, that means it is unavailable. If it says Make Unavailable, that means it is available.
Please note: It is good practice to make your course available prior to, but no later than the first day of classes. However, if you are still working on updating content, you can hide certain folders and items using this tutorial.
Please feel free to contact us with questions, concerns, or you if you need assistance.
Find more resources and tips for faculty from the Office of Online Learning, including multimedia and other tutorials.