Adding a video to your Blackboard course can be easily facilitated in one of two ways. You can either share a link to a Dropbox video file, or you can embed a YouTube video link into your course content. A YouTube link is suggested as it allows for easy playback and does not require your students to download large files to their devices.
Important Note: You should NOT upload video files directly to Blackboard, this causes issues with the storage size of your course which may cause it to be inaccessible.
Adding a video to YouTube is easy and free, it also allows for closed captioning, a must to ensure accessibility of your course.
Here’s how to get started:
Step 1: Uploading your Video to YouTube
Create your own (free) YouTube channel, and access your YouTube Studio by going to www.Studio.YouTube.com. (If you happen to have a google or Gmail account, you will have a YouTube channel already.)
YouTube Studio is where you will manage the videos in your account. Once you are done creating the video, before adding it to YouTube, make sure it is a .mov or .mp4 video. To export a video file from Camtasia, please see this tutorial: https://www.techsmith.com/tutorial-camtasia-produce-share.html
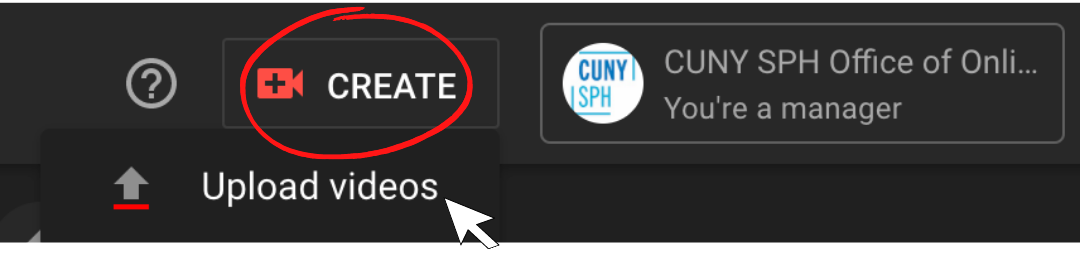
In YouTube Studio, once you have the correct file type (.mp4 or .mov) available on your computer, select Create, then Upload Videos (top right).
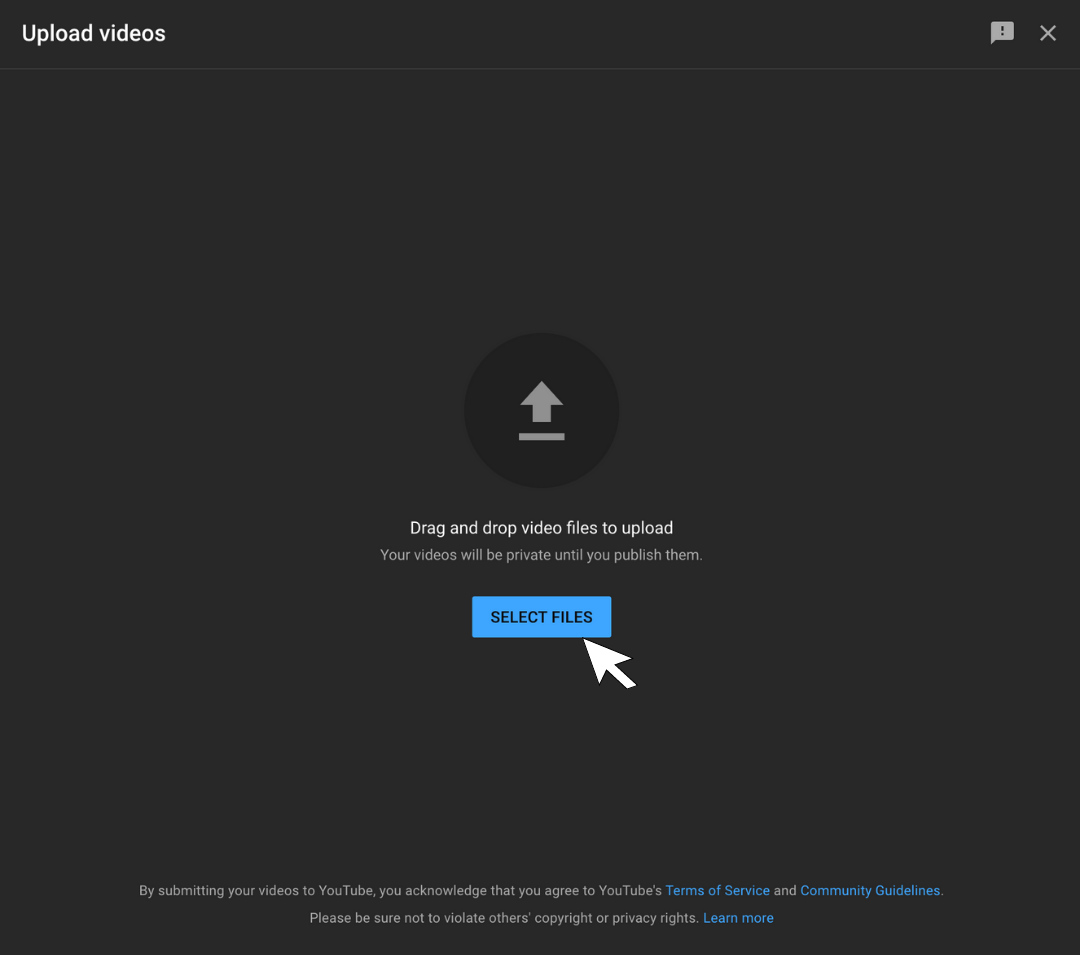
Select one or more videos from your computer that you wish to upload.
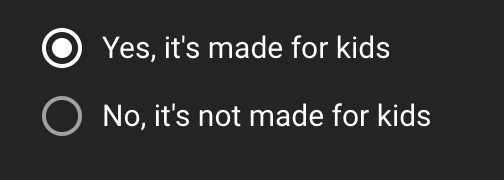
The details screen will indicate how far along you are with the upload process. During this time, you can enter in a specific title, description and/or upload a custom thumbnail (details below). Scroll down. Under Audience, you should select Yes, it’s made for kids. The only time you would not do this is if the video contains explicit content.
 Select Next (bottom right) to go through the Video Elements and Checks screens.
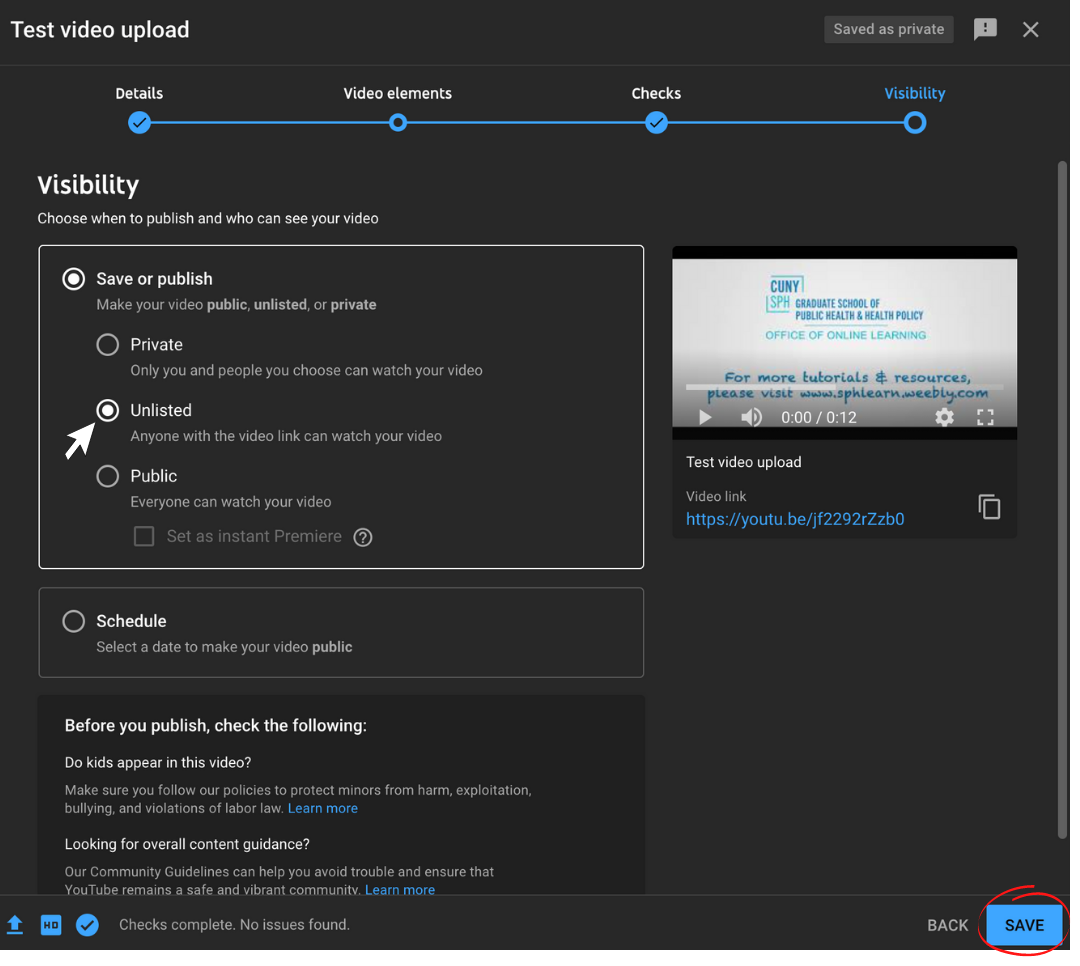
The Visibility page includes important details. If you do NOT want your video to show up in search results on Google, and if you wish to keep it visible only to your students, select Unlisted. When you’re done, select Save (bottom right).
|
The next screen shows you the status of your upload. Unless there is an error, you can click on that link and open it in a new tab of your browser. You will need this for the next step.
|
Please note: Some features including the auto generated thumbnails, and closed captioning/subtitles will not show until processing is complete, but you can always change any of this information on this details screen later (details below).
Additional note: If the video is not yet processed, you can still move forward with the next steps. You do not need to wait, YouTube will process in the background.
Seeing an Error? Avoid adding any hyphens or special characters to your file name and video title. This sometimes causes errors with the upload process on YouTube and/or the embedding process on Blackboard.
Step 2: Finding your YouTube link
First, you want to copy the embed code from YouTube. I suggest having a separate tab open for easy access to that page.
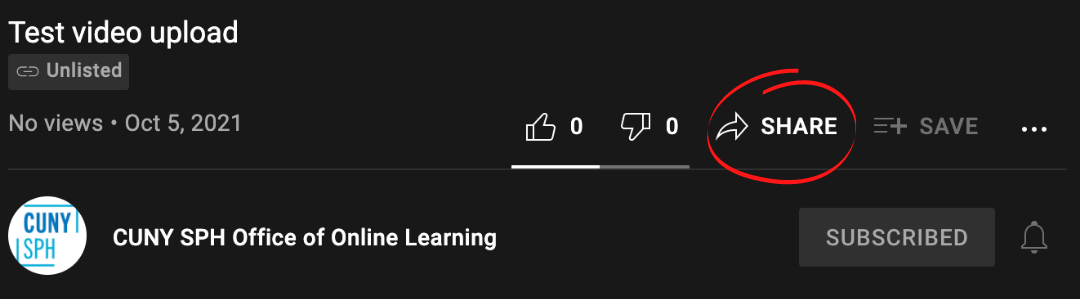
Once you’ve uploaded your video and saved all details it will show you a link to view your video (pictured above). Click on this link to open the video. This video page is where you can watch your video (it is not the edit page). Below the video player, select Share.
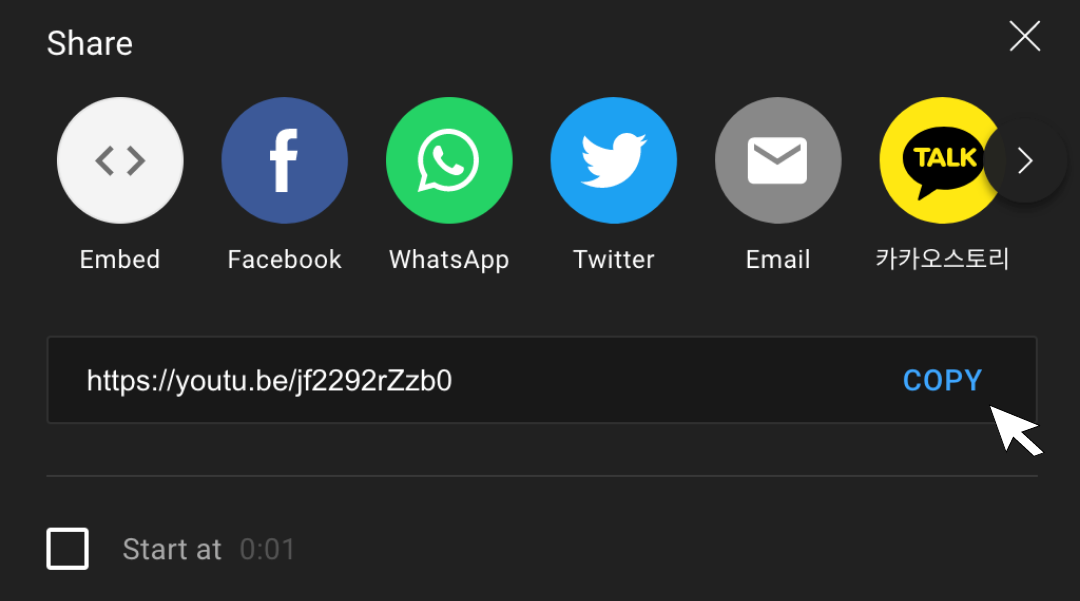
A popup window will appear with options, select Copy.
Step 3: Embedding your video in Blackboard
|
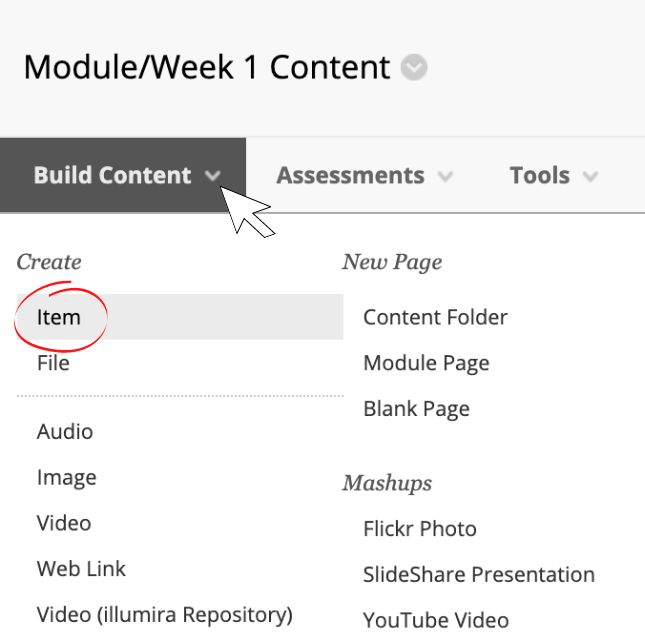
In Blackboard after you’ve logged in, navigate to your course and the specific folder where you wish to add your video. Once you’re in the folder, select Build Content, then select Item under the Create category. |
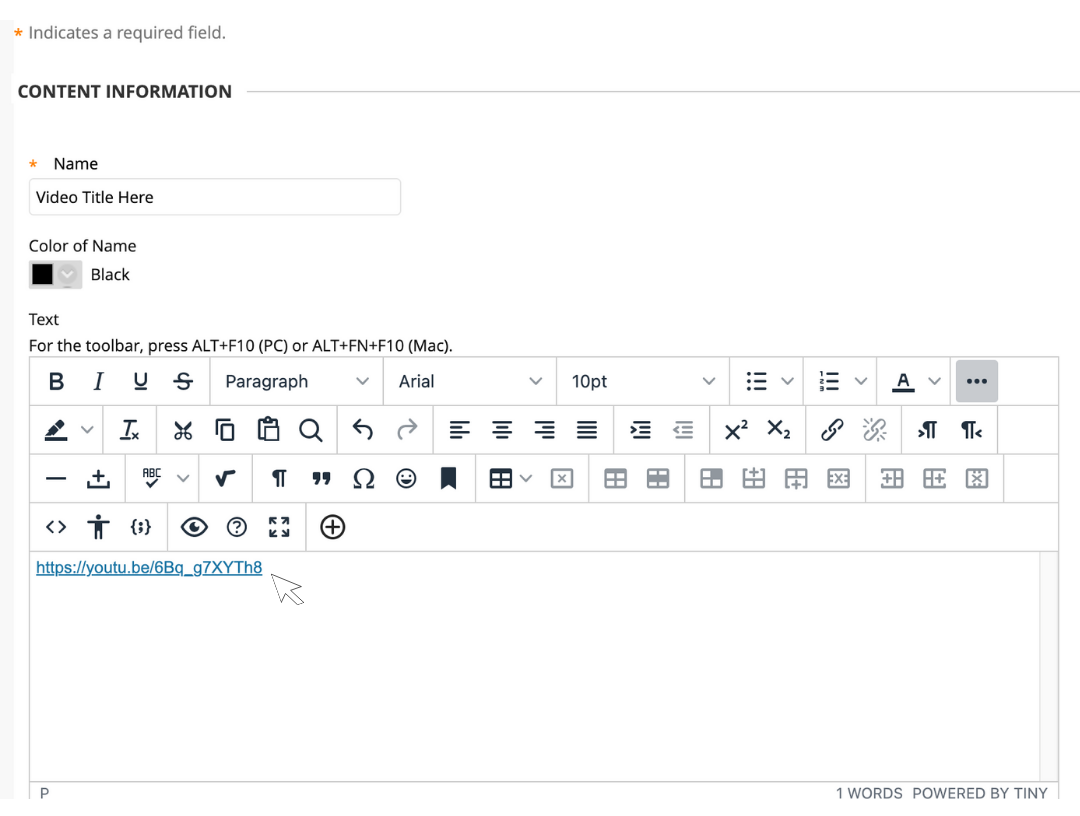
 Add your video name, then scroll down to the Description text box and paste the link to the YouTube video. After the link, press the Enter key. With the new Blackboard text editor, the video will automatically populate.
Then, back on the Item page, scroll down to the bottom and select Submit (bottom right) to save your changes.
Seeing an error? Check on the title of your video in YouTube under Details to ensure there are no hyphens or special characters in the title field.
Advanced Features & Additional FAQs:
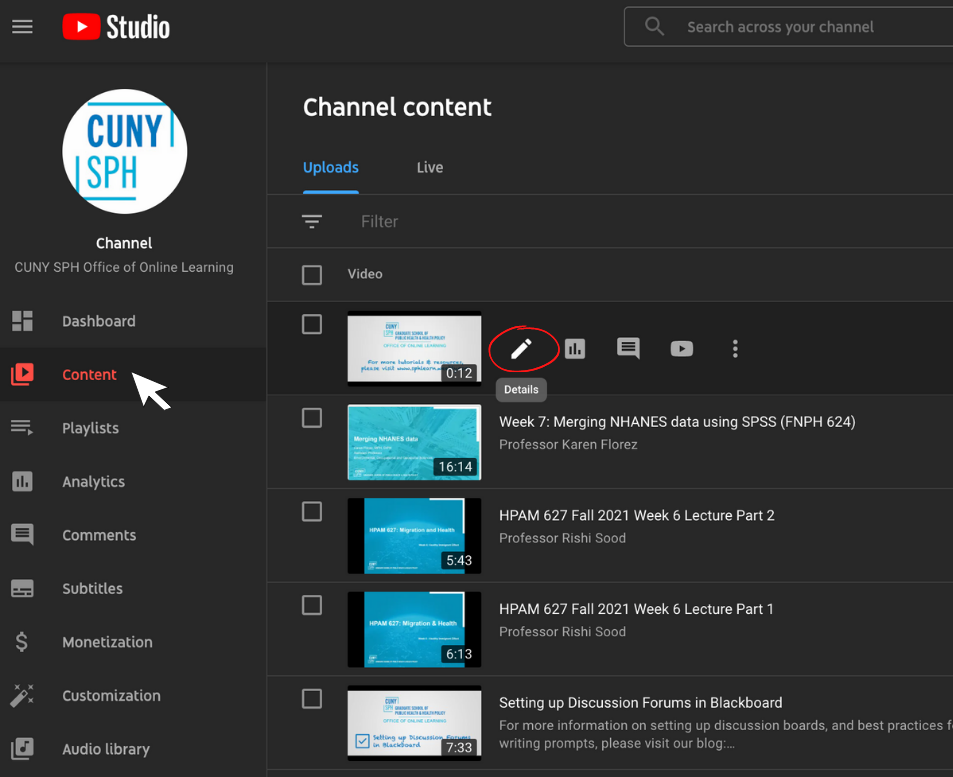
1. Editing video title, description, captions, etc. If you want to go back and edit any of the information you put in during the upload process, you can always go back to www.Studio.YouTube.com under the Content tab, and select the pencil icon to edit details for that video.
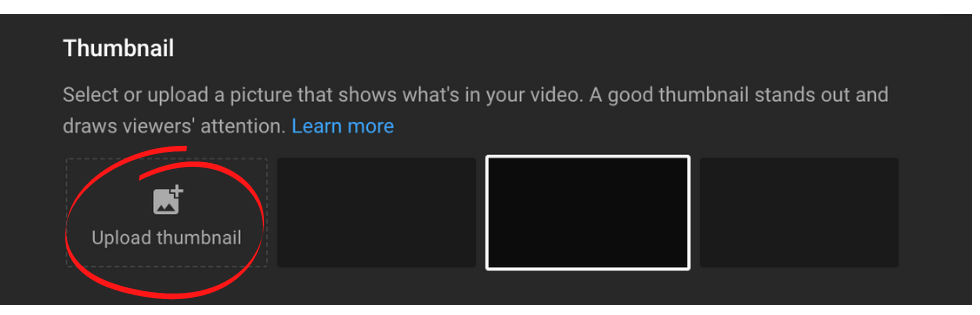
2. Adding a custom thumbnail. You may want to create a thumbnail for your video that shows the name of the class, week number, professor name, etc. At any point after a video has been uploaded, you can access the thumbnail option under Details when editing a video. The thumbnail section is below the description. It gives you a few automatically generated options to choose from. Just select the one you like, then hit Save at the top right. Or, you can upload a custom thumbnail of your own. To do this, use the official CUNY SPH powerpoint template (available here), and export a jpg image of the title slide. If your video already contains an appropriate thumbnail that is not one of the generated options, you can take a screenshot of any slide in your video (using Snagit on PC, or cmd+shift+4 on Mac) and add that as a custom thumbnail.
3. Adding Closed Captioning.
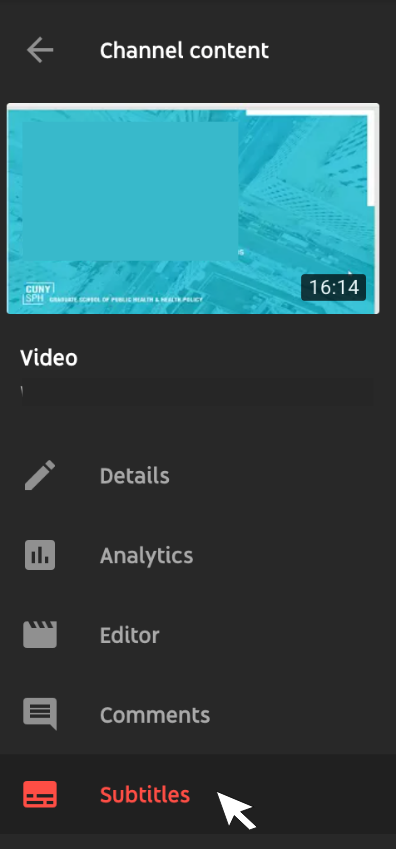
Your video must upload and fully go through the processing stage before it will start auto generating captions. Give your upload a few minutes and check back under YouTube Studio, click the Edit button next to the video you want to modify. Then navigate to the Subtitles tab on the left side of your video.
On the next page, you can either add your own captions, or edit the ones automatically created by YouTube.
-
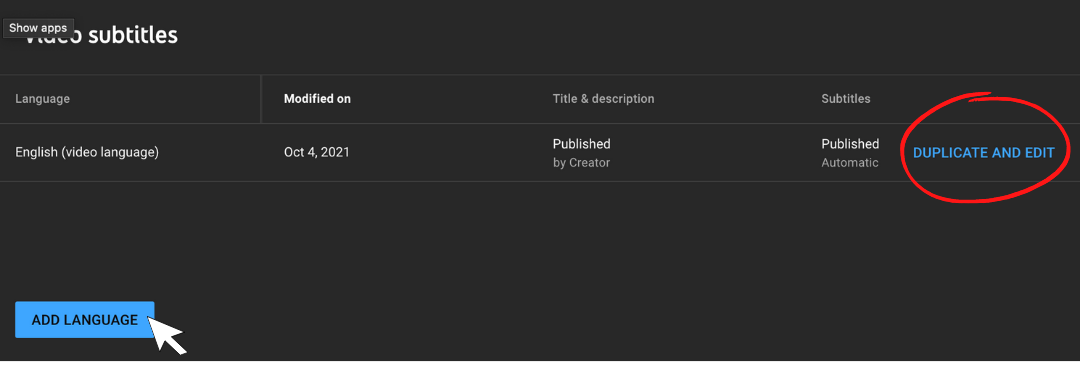
You can add multiple languages or different versions of captions by selecting Add New Language. Just be aware that whichever one you set as the default will be the version that viewers see first.
-
The auto generated captions are generally pretty accurate, but you may notice some errors. You can always go into this caption and modify the text by selecting Duplicate and Edit.
-
Not seeing captions? Auto generated captions typically take a few minutes beyond processing of your video, so if you don’t see them right away, check back later.
- The video below shows how to navigate within the captions editor. You can edit the text right in the text editor. Keep in mind that the timing has already been set for this video during the auto generate process. So if you want to break up certain lines for punctuation or pauses, you will want to click on Edit Timings to toggle to this view instead. Edit timings lets you drag the timeline (at the bottom) to adjust when a caption starts/ends or (on the left) you can choose to enter in the minutes/seconds/frames manually. When you’re done with the edits to your subtitles, select Publish (top right).
-
Shortcut Tip: If you happen to have a transcript that is more accurate than the automatic captions, you may want to go back to Edit as Text, delete the auto generated text, and then copy/paste in that accurate text. Then select Publish. You will have to give YouTube a few minutes to process this new text, but once that is complete you can come back to that caption and set the timings either yourself or let it set timings for you.
If you have any questions about this process or need assistance, feel free to reach out.
Find more resources and tips for faculty from the Office of Online Learning, including multimedia and other tutorials.