CUNY SPH faculty have access to Zoom. You can use Zoom for your class sessions and/or Office Hours, if you prefer it over Blackboard Collaborate.
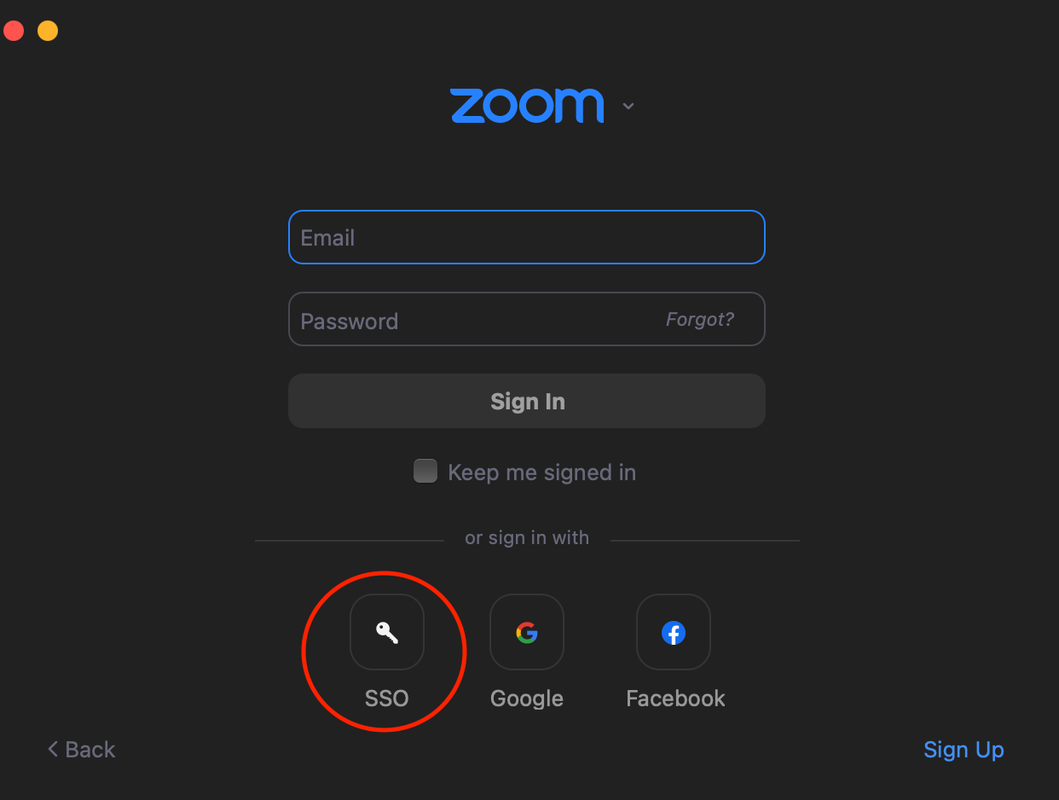
To login, just go to https://cuny.zoom.us (or open up the Zoom client on your computer) and select Sign in with SSO. There, you can enter your CUNY First Login credentials for access.
If you have trouble setting up your account the first time logging in, please contact helpdesk@sph.cuny.edu.
Quick start guides, training videos and FAQs about Zoom are available here.
Best Practices & Recommendations for Using Zoom in your Classroom
Scheduling: As an instructor it is recommended to create one recurring meeting for a single class. This allows you to use this same classroom for multiple class sessions, and you may also wish to use the same link for that class’ office hours.
See images below for a step by step on the settings you should select to create a recurring meeting:
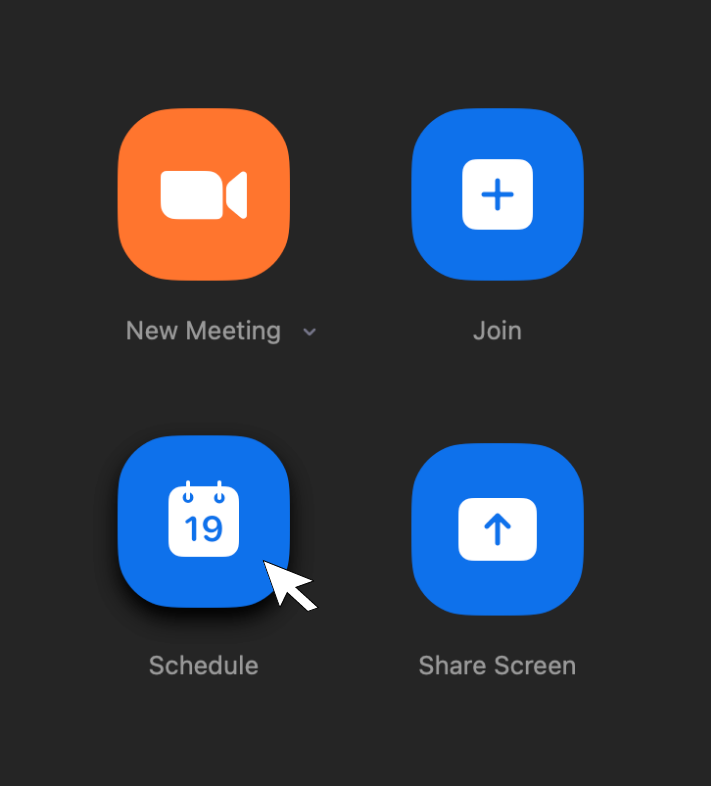
In the Zoom app, go to Home – select Schedule.
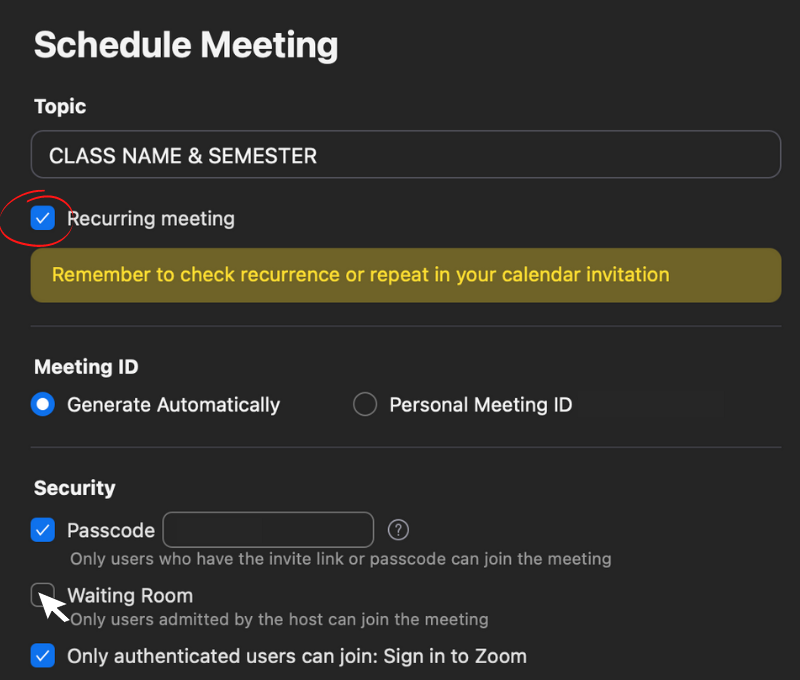
Next, select the box for Recurring Meeting.
-
-
Note: You may wish to enable the Waiting Room when you schedule a meeting, but remember that it will require you to admit students to the class session. This sometimes is time consuming and distracting when lecturing. You can always turn on the waiting room later if you are using this session for office hours and want to admit only one student at a time.
-
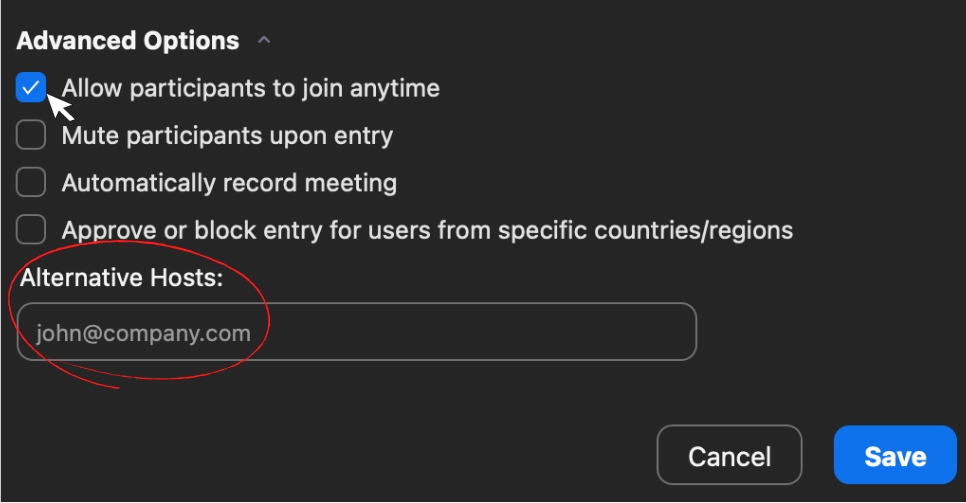
Under Advanced Options, you should check Allow participants to join anytime if you are making this a recurring meeting. You might also want to Mute participants upon entry or Automatically record meeting.
You can set Alternative Hosts if you have a TA or a guest speaker who might be joining the session before you or without you. This gives them permission to record, mute others and share their screen. You can always make someone a host or co-host during the meeting if you wish, but doing that would revert back to just you as the host, next time you log into the meeting.
Recording & Sharing Zoom Sessions
Whether you have a hybrid, hyflex or fully virtual classroom, you may wish to record the sessions and make them available for students to review. This is a good practice and enhances accessibility for students who are not so great about taking notes the first time around. There are many reasons you may wish to record your session.
When recording, it is best practice to let your students know that the recording is only available to the class and will not be shared externally (this can be done in your syllabus or on the first day of class).
Zoom has a built in record button, and when you click on it during a meeting it will ask if you prefer to do a Cloud or Local Recording.
-
-
Local recordings require storage space on your computer so it is recommended to check your hard drive space prior to a recording to ensure that you have enough space. A typical 1 hour class could take up to 5GB of storage space on your machine. If you do a local recording, you will have to upload that video to YouTube, in order to share it with the class. Unless you have permission from the students to share it publicly, it is best to select Unlisted for your sharing permissions. This keeps the video from being searchable on Google. However, be mindful of who you share the link with, because anyone with that link can view the video.
-
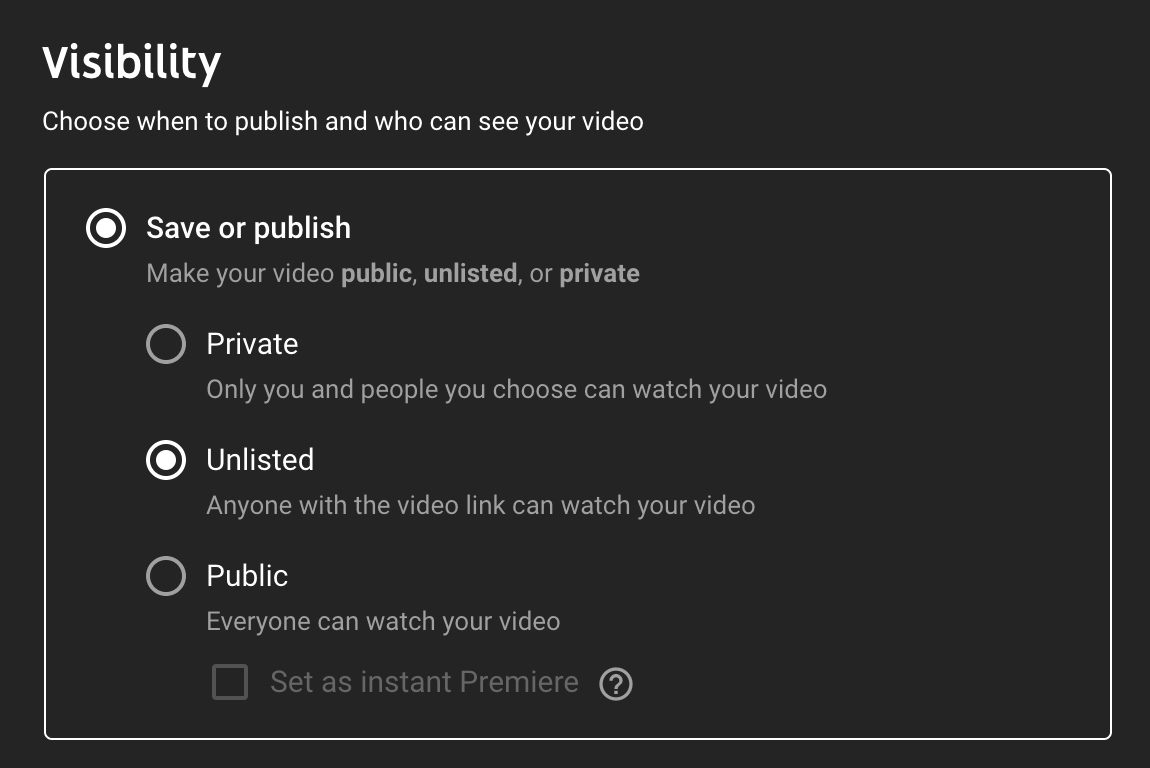 Select Unlisted on YouTube while uploading to create a link for a video that you can share in Blackboard.
-
-
Cloud recordings will be emailed to you once they are processed and you can share the links to each cloud recording with your class. You may also choose to download the cloud recordings to your device.
-
Sharing Tip: You might consider creating a YouTube Playlist of your class sessions each semester and post the playlist link to Blackboard. That way, you don’t have to share a new video link each week. Just add each new video to that playlist when you upload it. Find instructions on how to create and manage a YouTube playlist here.
OR
You can upload the local recorded files to Dropbox, which each CUNY SPH faculty member has access to.
Please note: YouTube videos are typically much easier for students to access & navigate than large video files. For more information on uploading your video to YouTube to embed into a Blackboard module, watch this video.
Other Tips & Ideas
-
-
Be aware of the View you are using while recording. What you see on screen is what will be recorded. You can toggle between Gallery (side by side with everyone on screen at once) or Speaker View (just the active speaker one at a time full screen) using the button on the top right of the Zoom window.
-
For the highest quality recording, select the checkbox for Optimize for 3rd party video editor in Zoom settings when scheduling your meeting. If you are recording locally, this typically takes up more storage space.
-
Zoom has live polls which you may wish to implement into your class for more interactivity. You can also use Poll Everywhere (free) if you wish.
-
You can enable the waiting room or allow students to share their screen, in an active meeting by clicking on Security (next to Participants in the center bottom of your screen).
-
Zoom does not record breakout rooms. You may wish to hit pause while recording if you plan on going into a breakout room for long. Otherwise, you will have a gap in your recording that will need to be cut out.
-
To edit or enhance your recording, you may use Camtasia which is a free tool offered to all CUNY SPH faculty. Find more information about Camtasia here. To do a simple trim at the beginning or end of a video, you can do so in YouTube under Edit.
-
Cloud Recordings are deleted regularly from the cloud. If you wish to retain the class recording for longer or indefinitely, you may wish to either download the cloud recording and save it (to Dropbox, or on your local computer), OR to do a local recording.
-
If you have spotty or inconsistent internet connection, it is ideal to do a cloud recording and to set an alternate host. This will ensure a more seamless recording. Cloud recordings simply will capture what is seen on your computer, so if you have any interruptions, those interruptions will be part of the recording.
-
If you have any questions about implementing Zoom into your class, please feel free to reach out to the Office of Online Learning.
Find more resources and tips for faculty from the Office of Online Learning, including multimedia and other tutorials.